News stories
Log in
Log in to the Sitekit content management system.
For reference, the full address is www.uhb.nhs.uk/admin.
Warning
Please use either the Google Chrome or Microsoft Edge browsers. Please do not use Internet Explorer, as some features of Sitekit may not work correctly.
If this is the first time you've used your login details, you will be prompted to set your own password.
If you've forgotten your username or password, please contact the Web Team for assistance.
Publishing a new story
Follow the steps below to publish a new story.
Create a news story
Step 1
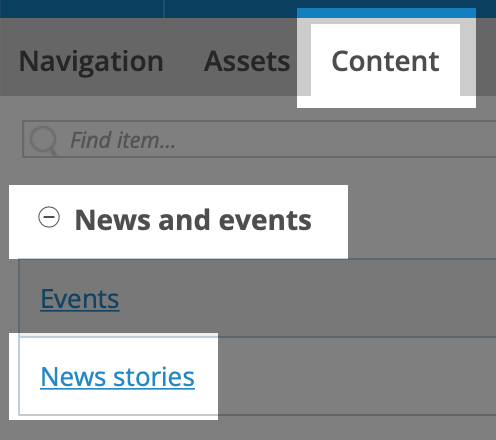
Click the content tab on the left of the admin window.
If not already expanded, expand the News and events section.
Click News stories.
Step 2
Scroll down to the end of the list of news stories in the right-hand panel until you see the blank text fields. You will use these to add your story.
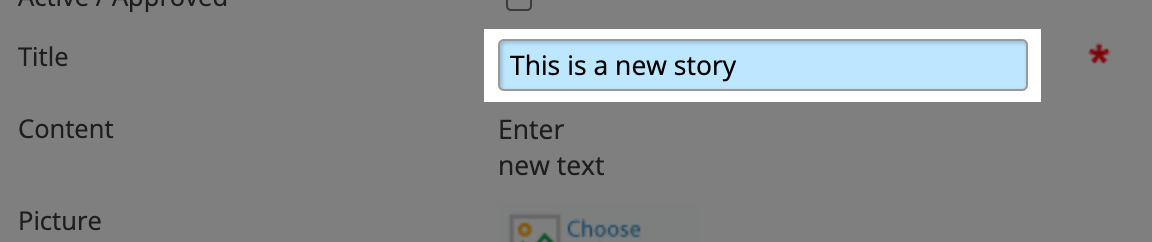
In the first blank field, enter the headline/title of the news story.
You can ignore the second field (date field) unless you want to schedule publication for a later date. By default, Sitekit will use the current date.
Click Add.

Step 3
After a couple of seconds, you should see a message telling you your story has been created, and the story will appear at the top of the list, in red text, highlighted in yellow. (Red text indicates that the story has not yet been published.)

Click the story's title or Edit to open the new story for editing.
Edit/add copy
Title
Check your title, which should be automatically populated with the headline you entered when you created the story, but you can use the Title field to edit this if necessary.
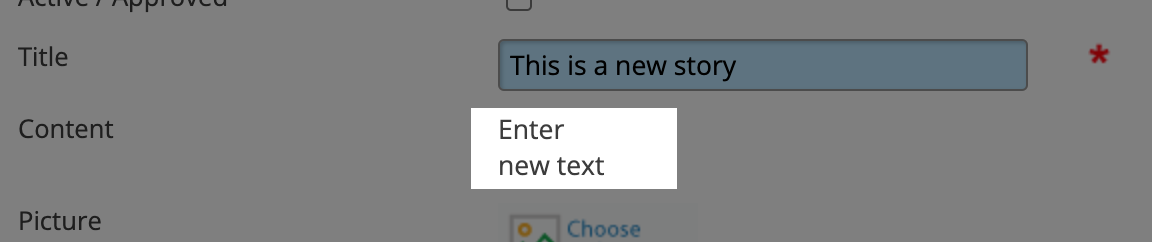
Body copy
Click Enter New Text in the Content field.
Important
Please ensure you read the guidance on editing and formatting copy before adding, editing or formatting copy.
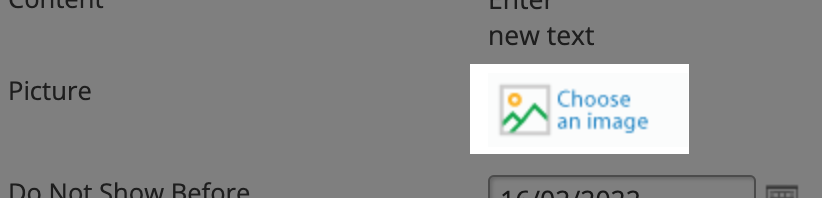
Add a picture
To add a picture to your story, click Choose an image in the Picture field. This will open sitekit's image picker.
Note
We will add instructions for optimising and uploading images soon. In the meantime, please follow instructions below to add a stock image.
If your story needs a specific image, please contact the Web Team who will prepare and publish this for you. If the story is time-critical, add a stock image, and the Web Team will log in and replace this once the specific image is ready.
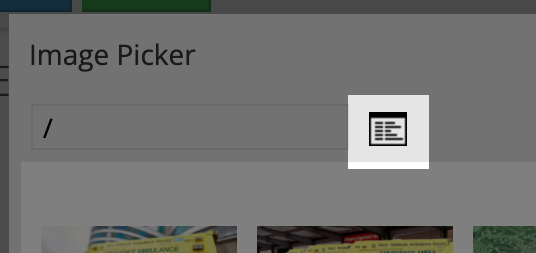
The quickest way to add a stock image is to search by typing news-stock- into the Find item... field in the image picker. This will bring up a gallery of stock news images. Click an image to add it to the story.

You can switch between list and thumbnail views of these images by clicking the toggle view button.
Important
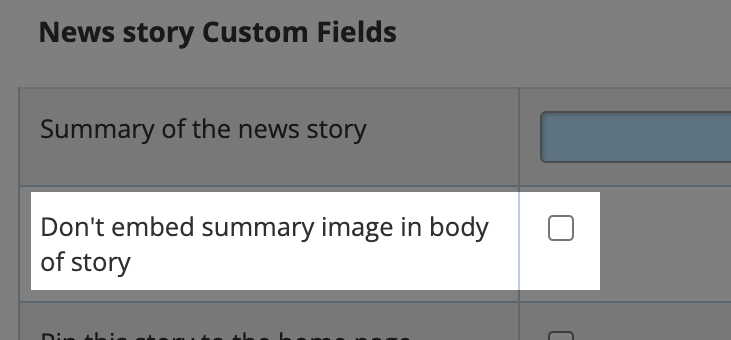
Stock images are only there to make sure the story is represented by an image in news listings and feeds, and should not show in the news story itself.
When using a stock image, please make sure you check the box Don't embed summary image in body of story.
Add a summary
Enter a summary in the Summary of the news story field. This will appear alongside the headline and summary image in news listings and feeds.

Note
Summaries should be no more than 25 words long.
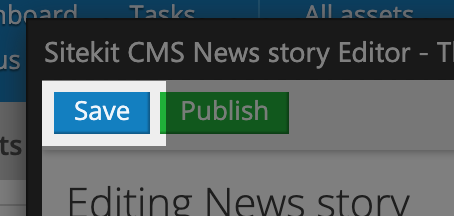
Publish the story
Step 1
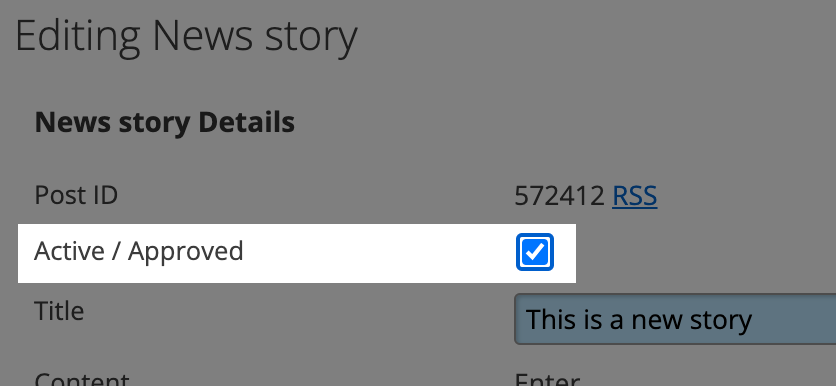
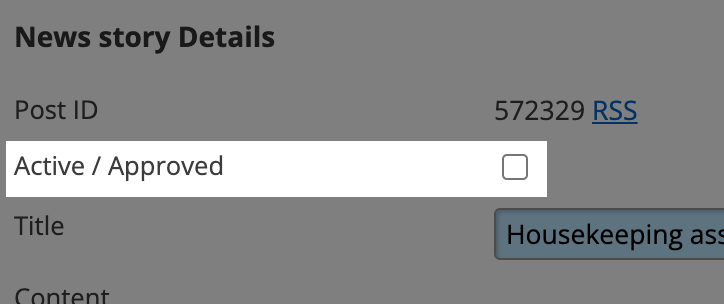
Ensure the Active / Approved checkbox is checked. Without this, the story won't show on the website.
Step 2
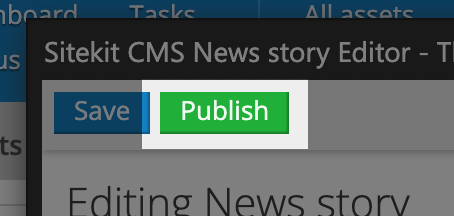
Click Publish.
Note
To save a draft of the story without publishing it to the live website, click Save.
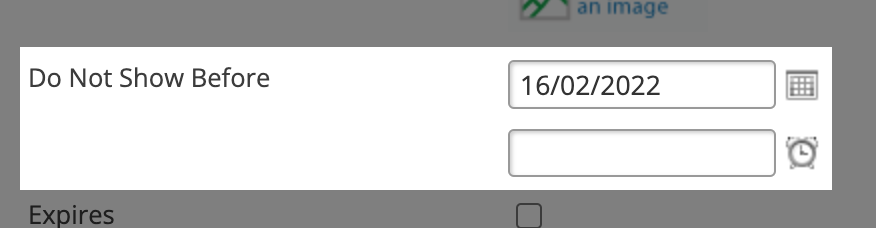
Schedule a story
To publish a story at a date and time in the future, use the Do Not Show Before fields.
You can either click the calendar and clock icons and choose dates and times, or type in your own.
If typing, use the format DD/MM/YYYY for the date. For the time, use the format HH:MM, using the 24-hour clock.
Editing or removing a story
Follow the steps below to edit or remove an existing news story.
Edit a story
Step 1
Click the content tab on the left of the admin window.
If not already expanded, expand the News and events section.
Click News stories.
Step 2
Find the story you'd like to edit.
Click either the story's headline or Edit in the Actions column.

Step 3
Follow the instructions for a new story to edit and publish the story.
Important
Please ensure you read the guidance on editing and formatting copy before adding, editing or formatting copy.
Note
You can search for stories by typing into the Show news stories containing field, then clicking Go. (This searches new stories' headlines, and not their content.)
You can also re-order the list of stories by clicking the Name and Start Date column headings in the table of stories.
Hide a story
Follow these steps to hide a story without deleting it. This is useful if the story may need to be republished.
Step 1
Click the content tab on the left of the admin window.
If not already expanded, expand the News and events section.
Click News stories.
Step 2
Find the story you'd like to edit.
Click either the story's headline or Edit in the Actions column.
Step 3
Uncheck the Active / Approved checkbox.
Step 4
Click Publish.
Note
You can search for stories by typing into the Show news stories containing field, then clicking Go. (This searches new stories' headlines, and not their content.)
You can also re-order the list of stories by clicking the Name and Start Date column headings in the table of stories.
Delete a story
Step 1
Click the content tab on the left of the admin window.
If not already expanded, expand the News and events section.
Click News stories.
Step 2
Find the story you'd like to delete.
Step 3
Click Delete in the Actions column. Click OK to confirm.

Warning
Deleting a story is permanent. A story can not be retrieved once deleted.
Note
You can search for stories by typing into the Show news stories containing field, then clicking Go. (This searches new stories' headlines, and not their content.)
You can also re-order the list of stories by clicking the Name and Start Date column headings in the table of stories.